Minecraft has become a beloved platform for children to unleash their creativity, explore boundless virtual worlds, and learn to collaborate with others. One of the most exciting aspects for kids is the ability to create their own Minecraft server, providing them with a unique space to play and interact with friends.
If you’re a parent, we’ll walk you through the steps for how to set up a Minecraft server, ensuring a safe and enjoyable gaming experience for your child. If you’re a kid, show this article to your parents to help you easily create a Minecraft server. These instructions are for parents only. Parents, you should always monitor your Minecraft server and make sure you are comfortable with who joins the server so you know who your child is interacting with. This article is instructional only, and Lavner Education is not responsible for anything that happens on your server. 😀
Why Children Want Their Own Minecraft Server
Children crave autonomy and the ability to customize their gaming experiences. By owning a Minecraft server, they can invite friends, set their own rules, and build together without limitations. This fosters a sense of ownership and creativity that enhances their overall gaming satisfaction.
How Parents Can Help in Creating a Minecraft Server
Safety is a top priority when it comes to online gaming. If you’re a parent, you can take comfort in knowing how to make a Minecraft server and run it because it allows for a controlled environment. You have the power to whitelist players, ensuring that only approved individuals can join. Additionally, you can implement various plugins and mods to further enhance security measures.
It is important to note that playing with people you know and trust keeps your home network relatively safe. However, if you plan on opening up your server to a larger sphere or the public, it is advisable to acquire a third-party hosting service, like Minecraft Realms, or Realms Plus. With Realms, you can still customize and control everything, but you aren’t hosting on your home network, which is safer.
How to Create a Minecraft Server on PC (Windows) vs. Mac (iOS)
Setting up a Minecraft server on your home network is pretty simple if you are less than familiar at using your PC and network. For more in-depth instructions on how to create a Minecraft server, and to properly configure your PC and network, you can visit the Minecraft help center directly, or look for specific trouble-shooting in the Minecraft Wiki.
The process of creating a Minecraft server varies slightly depending on the operating system. Below, we outline the steps for both Windows and Apple.
Home Computer Minecraft Server Setup
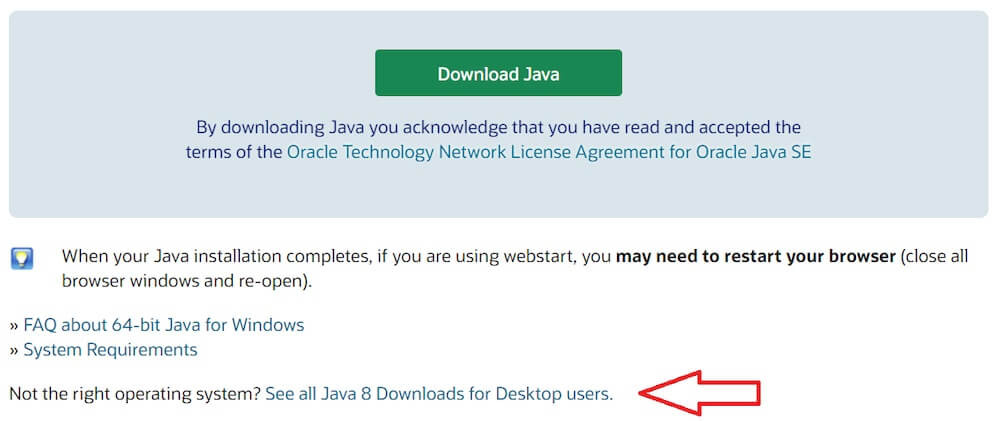
- Ensure You Have the Latest Version of Java: Minecraft is a Java-based program, so be sure that you are running the latest version. Click here if you need to update. There is additional information and links for both Windows and iOS.
- Get Minecraft: If you don’t have Minecraft, you will need to purchase it or download the right version of it.
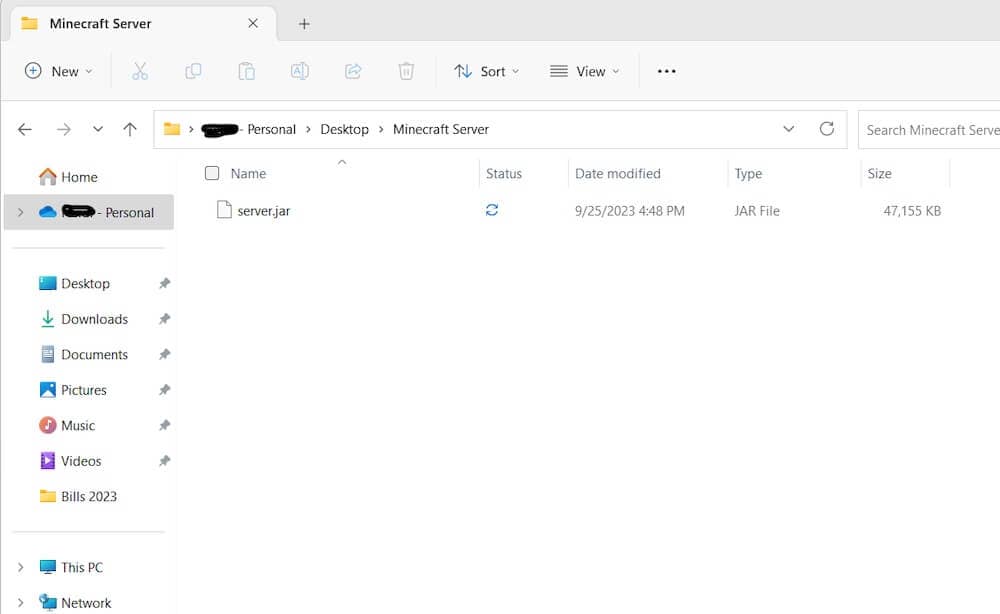
- Create a New Folder: You will want to create a new folder on your computer to save your server files in. Make sure to name it something easy to remember like “Minecraft Server,” and save it where it will be easy to find.
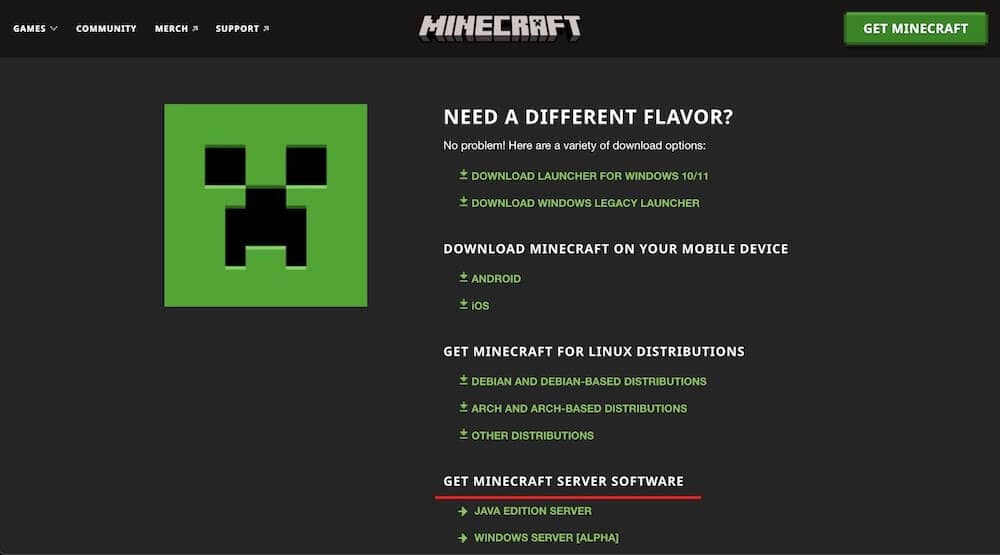
- Download Minecraft Server Software: From the official Minecraft website, you can download the server software for Windows (or Minecraft.dmg on MacOS):
Save these to the new folder you made (it should look something like this: minecraft_server.1.20.2.jar).
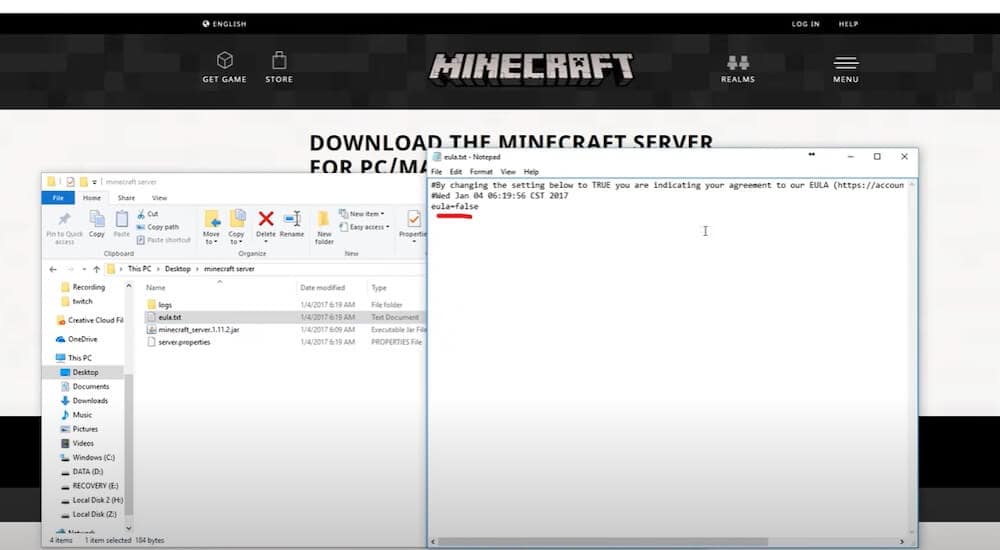
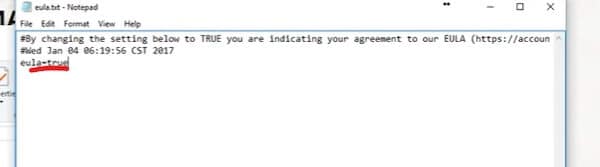
Double-click the server file and it will open other files. One of those will be the EULA. - Sign the EULA: Before running your server, you will need to sign the End-User License Agreement. To do this, you will need to click on the eula.txt file to open the dialog box. Change eula=false to eula=true. Save that and you will be able to move forward. For the full EULA, click here.
- Save the Run Command:
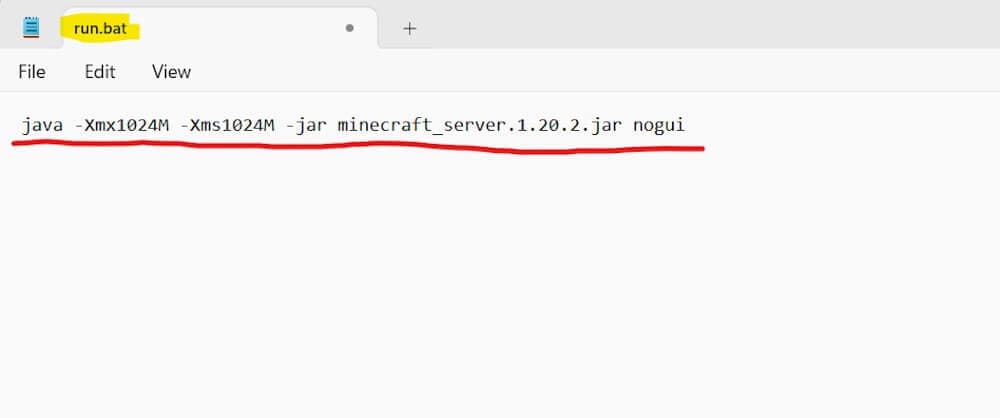
- Copy the .jar run command code that corresponds with the version of Minecraft you are using from here. It will look like: java -Xmx1024M -Xms1024M -jar minecraft_server.1.20.2.jar nogui
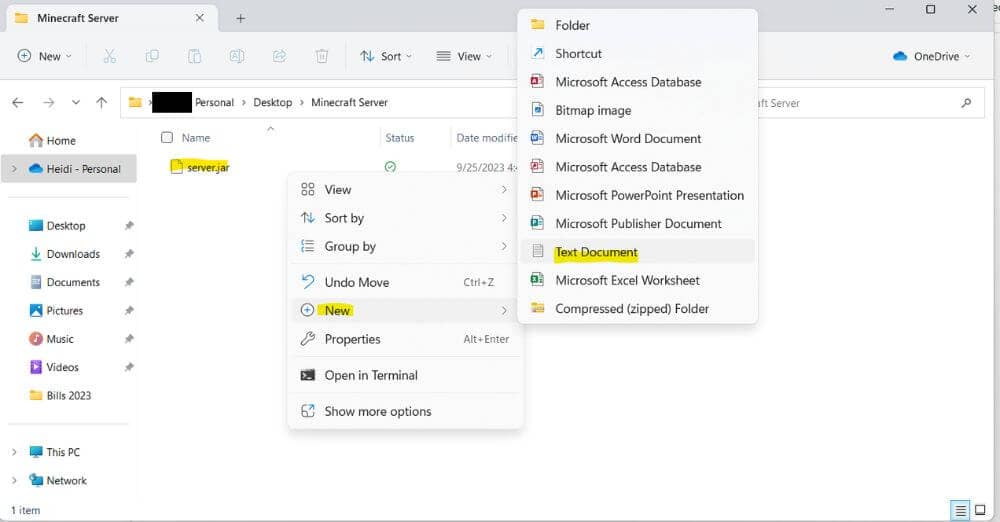
- Right-click within the folder you made for server files and select “new,” and “text document.” Paste the run code above onto this document.
- Name this file run.bat and save (be sure to remove the .txt extension)
**Note that the latest Minecraft version will slightly alter the .jar file and the corresponding run command.
- Select “All Files” as the file type when saving.
- Launch Server: Run the downloaded .jar file by double-clicking it. You might have to refresh before this step. As long as this window is open, your server is open and your invited players will be able to connect. The server window will keep track of things, see activity and:
- Allow you to enter server commands.
- See how much memory the server is using in the Stats panel.
- See who is currently connected to the server in the Players panel.
- See server messages and player chats in the Log and Chat panel.
- Join Your Server: To connect Minecraft to your server, or join them:
- In the Minecraft main menu, select “Multiplayer”
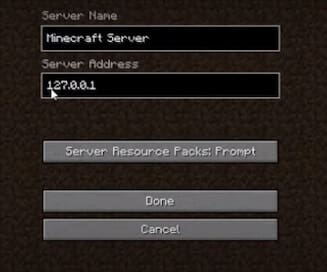
- Click “Add Server”
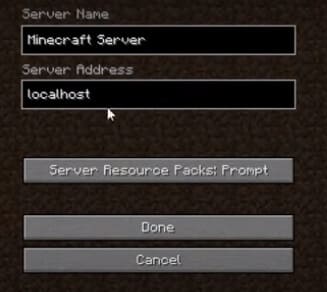
- Name your server in the “Server Name” field
- Type “localhost” in the “Server Address” field (alternately, you could type your actual IP address, but it isn’t necessary)
- Click “Done”
- Select your server and click “Join Server”
- Configure Server Settings: You will want to customize the server settings, including the world name, game mode, and player limit. You can do this inside the server property files. Common things to configure are who can join, what to name your world, and whether you want to use Creative Mode.
- Open the file folder called server.properties
- Change the properties of your Minecraft world by editing lines of the file
- To change to creative: gamemode=1 puts your server in creative mode
- Max‐players=20: change this number to increase or decrease the number of players that can join your server at one time.Be sure to only change words and to keep the format used in the code.
- Open Router Ports: This is also called port forwarding and means adjusting settings on your router so you can make a computer on your home network available to online players. The process can be different for everyone, depending on the kind of router you have. For more information on this process, click here. To find instructions for your particular router, click here and follow the instructions for porting forward.
- Invite Players: Share your server address with friends to start playing together. To find your external IP address:
- Open a browser window in Chrome
- Type “What’s my IP address?”
- Copy the number Google provides
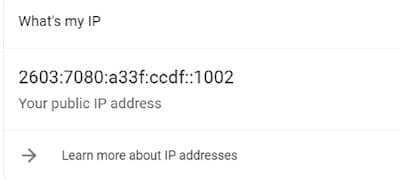
To invite friends onto your server, send them your IP address and the port number: 25565. They will join using the same steps you did to join your server (above), but they will use the IP address you gave them with the port number at the end. It will look something like this: 2603:7080:a33f:ccdf::1002:25565
Lavner Education: Enhancing STEM Learning
At Lavner Education, we’re passionate about empowering young minds with cutting-edge STEM education. Through our online tutoring and in-person camps, children can dive into the world of coding, game design, robotics, and more.
Explore our courses and camps available nationwide:
- 3D Innovation & Design with Minecraft Camp (ages 7-12)
- Minecraft Camp – World Builder & Competitions (ages 10-14)
- Minecraft Camp with Harry Potter Themed Events (ages 7-12)
- Minecraft Channel For YouTube Camp (ages 8-12)
- National Minecraft Camp – World Championship Tournament (ages 7-14)
- 3D Printing Camp for Minecraft and Roblox (ages 7-12)
- Vanilla Minecraft Coding Camp (ages 10-14)
By providing the tools and knowledge on how to create a Minecraft server, we aim to enrich your child’s gaming experience while fostering skills in technology and creativity. Now that you know how to start a Minecraft server, you can control the environment, the number of players, and who plays within your child’s creative space. Happy gaming!